|
Author
|
Message
|
|
Hutz 292
|
|
|
Group: Forum Members
Last Active: 9 Years Ago
Posts: 228,
Visits: 1.1K
|
I haven't read every post but check Dakota Digital. I bought a gauge set for my 62 F100. They fit right into my factory spot. Comes with all the senders and you use the factory fuel sender. dakotadigital.com Their stuff is amazing. Give them a try.
|
|
|
|
|
charliemccraney
|
|
|
Group: Moderators
Last Active: 5 hours ago
Posts: 6.1K,
Visits: 442.5K
|
Woohoo! Finally, time to get more done with this! I aim to be done with this by summer. 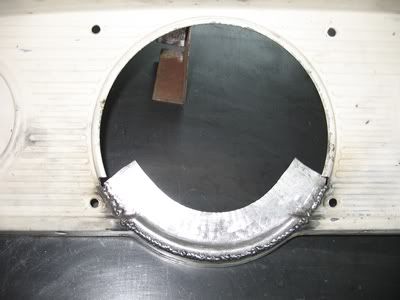 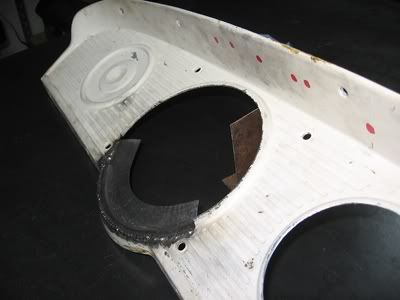 Getting it lined up tor the first tack was tricky. A combination of the panel not being flat, and my novice metal working skills. The solution I came up with is to use magnets to hold it in place and a bolt so that I could use the threads for fine adjustment. The mass of the bolt was not significant enough to stay in place with the force of the piece acting on it so the exhaust clamp prevented the bolt from moving. 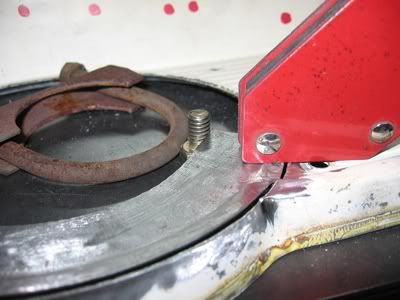 Now I need to grind the welds smooth, cut out the center of the panel and drill mounting holes for the new insert, weld the mounting studs to the insert, paint it and make the lens for the indicator lights. The hard work is done!
Lawrenceville, GA
|
|
|
|
|
charliemccraney
|
|
|
Group: Moderators
Last Active: 5 hours ago
Posts: 6.1K,
Visits: 442.5K
|
No more progress, yet, but while I was at the salvage yard last weekend I saw one way the factory did it. Just a hole punched in a panel, some translucent plastic and tape! 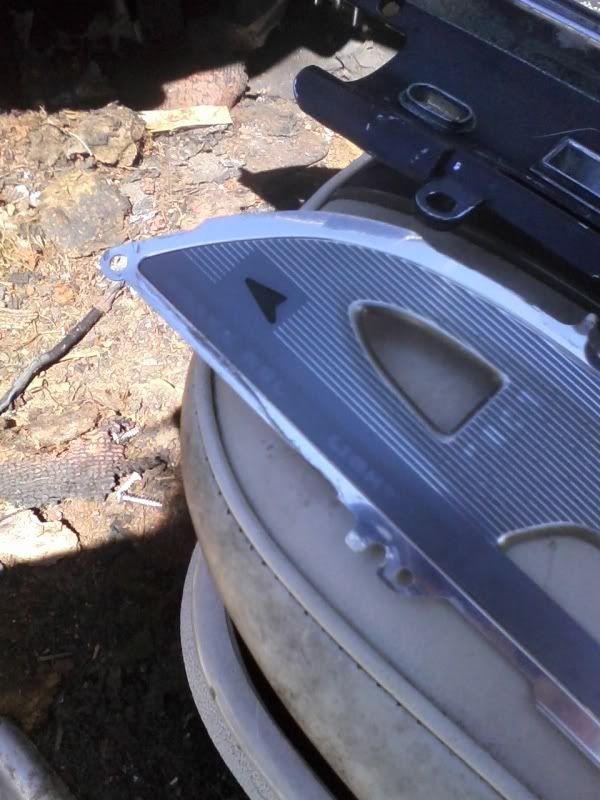 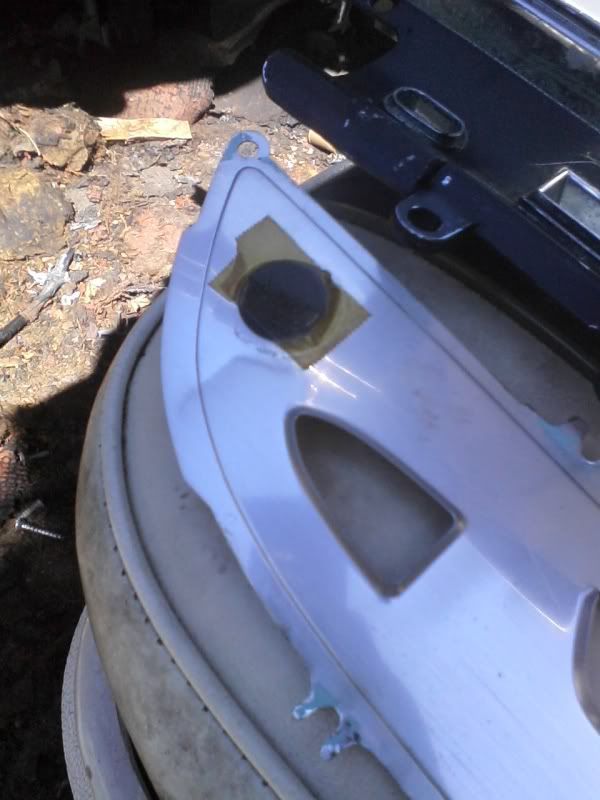
Lawrenceville, GA
|
|
|
|
|
charliemccraney
|
|
|
Group: Moderators
Last Active: 5 hours ago
Posts: 6.1K,
Visits: 442.5K
|
I think that's it. It starts with one type of regulator that is not variable, then goes into the variable regulators, and finally adding complimentary transistors and a trick about adding a diode increase the output for certain situations. There are 5 or 6 circuit diagrams.
Lawrenceville, GA
|
|
|
|
|
GREENBIRD56
|
|
|
Group: Forum Members
Last Active: Last Year
Posts: 1.7K,
Visits: 102.7K
|
Charlie - I think the article you found is in the May "Rod and Custom"???? It has all of the right stuff in there. I can scan you a copy if you want it? The regulator I built for my kids' caboose ran on DC volts - and worked like a charm - the running light LEDS never changed brightness at all so long as the volts on the track stayed above the min (for the LED's)
Steve Metzger Tucson, Arizona
|
|
|
|
|
charliemccraney
|
|
|
Group: Moderators
Last Active: 5 hours ago
Posts: 6.1K,
Visits: 442.5K
|
GREENBIRD56 (8/18/2010)
I've got an idea for some extra research/reading when you've got the time - look at some model railroading electronic project books. There are some "Radio Shack" voltage regulator chips and such - that will fix the brightness of your LED'sthrough a fairly wide range of input voltage - say 5 vdc to 15 vdc. By building a regulated power supply - you won't have the effect of "OHM's Law" working on your dropping resistor package.I haven't done much research on this subject. A couple weeks ago, I picked up a magazine which had an article about building voltage regulators. One is a transistorized variable regulator, variable meaning it can be built to provide any output within a certain range, not that you can adjust it with a knob or something like that. The article wasn't clear about input voltage but I have a feeling it's exactly what you're talking about, Steve. So if I have any issues, once it's up and running, I'll build one. A stable output voltage, regardless of input might come in handy.
Lawrenceville, GA
|
|
|
|
|
charliemccraney
|
|
|
Group: Moderators
Last Active: 5 hours ago
Posts: 6.1K,
Visits: 442.5K
|
|
|
|
|
|
charliemccraney
|
|
|
Group: Moderators
Last Active: 5 hours ago
Posts: 6.1K,
Visits: 442.5K
|
|
|
|
|
|
charliemccraney
|
|
|
Group: Moderators
Last Active: 5 hours ago
Posts: 6.1K,
Visits: 442.5K
|
Wow, it was August when I last posted about this. I admit, I got lazy at the end of last year. With temperatures rising again, I've come out of hibernation. I pretty well finished the filler panel for the lower section of the instrument panel today. All that's left is to weld it in place. 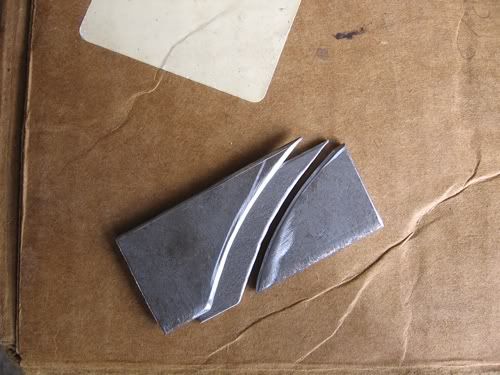 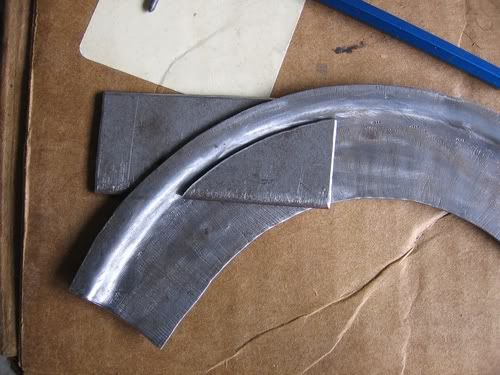 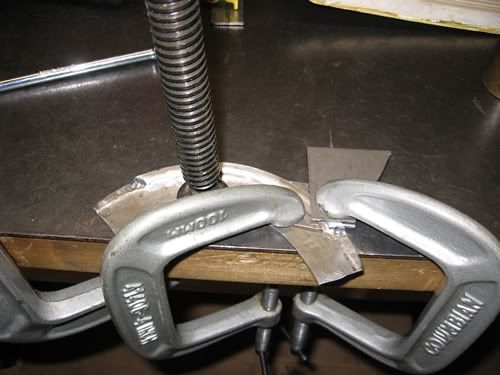 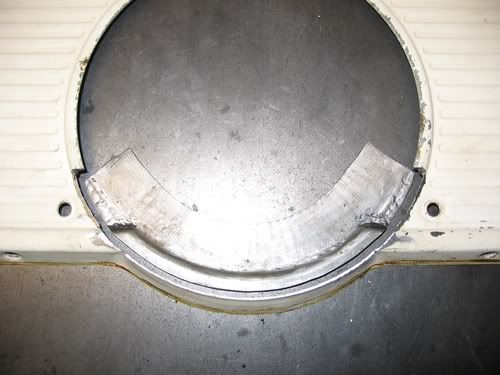 This is the first time I've ever made something like this. I'm quite happy with the results. I have made more progress on the indicator lights but not enough to post anything about just yet. That is pretty well all that is left to complete this project. Otherwise, I just gotta try not to warp everything when I weld it together.
Lawrenceville, GA
|
|
|
|
|
charliemccraney
|
|
|
Group: Moderators
Last Active: 5 hours ago
Posts: 6.1K,
Visits: 442.5K
|
Thanks! I haven't been called a true hot rodder before. I really appreciate that. I am a little concerned about light bleeding through. With the LEDs, most of the light is directed ahead of it rather than to the sides. As a result, the housing is not concerning me as much as the lens. The housing (white portion) will be Nylon. I already have it and it's nearly opaque. The cavities in the housing will be only as big as necessary and will approximate the shape of each symbol where reasonably possible. This will help to direct the light precisely where it needs to go. I think the lens is going to be the trickiest part of this whole project. For the first version (hopefully the last), I have some adhesive backed pvc which I will stick to the back side of the lens with the appropriate shapes for the symbols cut out. On the front, I will mask off the symbols which will need to be placed almost exactly opposite the pvc symbols, and paint the lense white to match the instrument panel. The idea is that the pvc will allow only what light is needed to enter the lens, reducing the amount it bleeds and making for sharper looking symbols. ...We'll see if that happens. I have since modified the housing design from the original. I think this one will make it a little easier to work with for R&D purposes. I'm not planning to do much gluing until I verify that it works.  Here it is roughly fitted to the light support dealamajig. I don't want to install it yet. The led panel fitting thingies look like they will be a real pain to remove once installed. The metal piece is the part in the back in the rendered drawing. 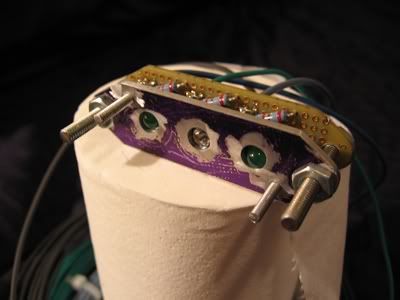 Let me get it made before I think of any kind of production. It's a lot of work.
Lawrenceville, GA
|
|
|
|