|
Author
|
Message
|
|
dbird
|
|
|
Group: Forum Members
Last Active: 2 Years Ago
Posts: 279,
Visits: 4.0K
|
I used Vic's socket method for installation, which worked well. For removal, I used a variation of Daniel's in that instead if burning the rubber our, I used a drill with a bit roughly the width of the rubber to remove the majority of the rubber and remove the center then scored it with a saw to be able to split it, so it would fall right out. Just taking the center out makes it much easier to press out.
Don
|
|
|
|
|
lyonroad
|
|
|
Group: Forum Members
Last Active: 10 Years Ago
Posts: 703,
Visits: 3.1K
|
No floor press and I didn't have any sockets large enough to use Vic's approach. I used short pieces of exhaust tubing and some scrap aluminum plate that I was able to drill large holes into fairly easily. I also made use of the large washers that came off the original bushings. If you are going to reuse the washers don't use them for the installation process as they tend to get flattened out. I took a large bearing puller apart and used the threaded shaft and the three armed nut. With some anti-seize they went in very easily.
Mark
Mark
1956 Mercury M100
1955 Ford Fairlane Club Sedan
Delta, British Columbia
|
|
|
|
|
Rono
|
|
|
Group: Forum Members
Last Active: Last Year
Posts: 1.3K,
Visits: 80.0K
|
Thanks Mark. Did you use this technique because you didn't have a floor press? I'll go with whatever works best without damaging the control arms. Rono
 Ron Lane, Meridian, ID Ron Lane, Meridian, ID
|
|
|
|
|
lyonroad
|
|
|
Group: Forum Members
Last Active: 10 Years Ago
Posts: 703,
Visits: 3.1K
|
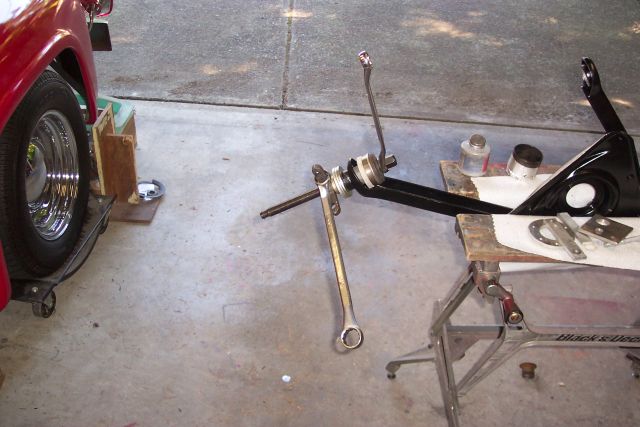 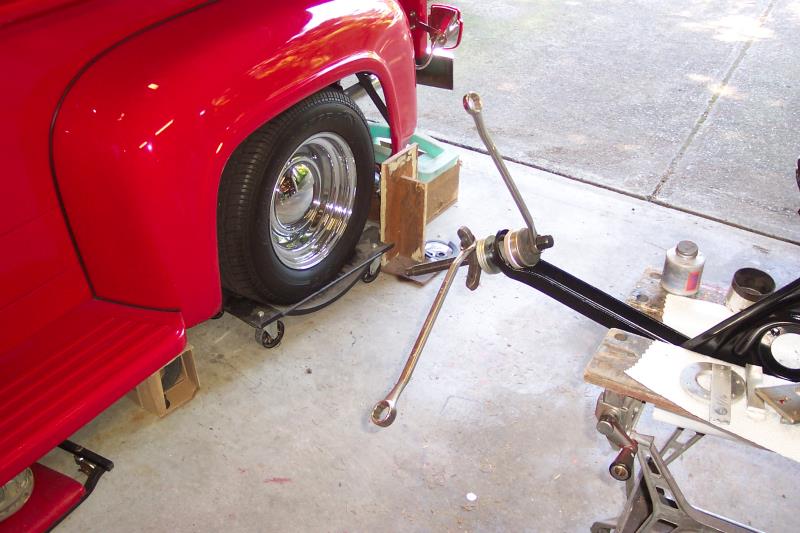 Rono, here is how I installed the bushings. To separate the rubber from the old bushings I drilled out the rubber with a small drill bit (1/8" or so). To get the bushings out of the A arms I used a hack saw to cut through most of the bushing then twisted it to pieces with a vice grip. I had to take off the hacksaw blade, insert it in the bushing and then reattach it to the handle if that makes sense. Mark
Mark
1956 Mercury M100
1955 Ford Fairlane Club Sedan
Delta, British Columbia
|
|
|
|
|
Rono
|
|
|
Group: Forum Members
Last Active: Last Year
Posts: 1.3K,
Visits: 80.0K
|
Daniel; I read your entire blog on your front suspension work this morning. When you did all that work I was in the middle of my moving adventure and setting up the new house and shop in Bishop. Hard to believe that was almost a year ago now. Anyway, lots of good pictures and information. I'm sure I'll be referencing your work again when I get fully involved with the Ranch Wagon. Rono
Ron Lane, Meridian, ID
|
|
|
|
|
Vic Correnti
|
|
|
Group: Forum Members
Last Active: Yesterday
Posts: 347,
Visits: 12.3K
|
I use a vise and different diameter sockets.
 Vic Correnti Vic Correnti
|
|
|
|
|
Daniel Jessup
|
|
|
Group: Forum Members
Last Active: 49 minutes ago
Posts: 2.0K,
Visits: 130.9K
|
Here is a link to my "blog" http://forums.y-blocksforever.com/Topic106486.aspxOne thing I did as well was to heat up the rubber and pull out the sleeve in the middle. This made getting at it pretty easy. I think on a couple of them I used a jigsaw with a metal blade to cut the wall of the bushing and then just simply tapped them out.
Daniel JessupLancaster, California aka "The Hot Rod Reverend" 
check out the 1955 Ford Fairlane build at www.hotrodreverend.com
|
|
|
|
|
5d6fairlane
|
|
|
Group: Forum Members
Last Active: 4 Years Ago
Posts: 57,
Visits: 2.4K
|
As I recall use the air chisel on each side of the bushing stopping just short of the control arm then the shell will collapse. If you are lucky it will drive the whole bushing out but not likely. Putting them back in is a bigger pain because you have to support the back side of the control arm under each bushing. I really cant remember how I got them in because I had to rig up some tool maybe with a rental bushing install kit. I do remember that finding Quality bushings were a problem and that NAPA had some older Moog that were well made. TRW catalog is incorrect also.
|
|
|
|
|
Jimz Bird
|
|
|
Group: Forum Members
Last Active: 10 Years Ago
Posts: 118,
Visits: 7.9K
|
There is a Product Service Letter to the 55 Shop Manual
http://forums.y-blocksforever.com/Topic98723.aspx#bm98774
Jim
Norfolk, VA

"MABLE"
1956 Thunderbird Green / Brown Interior (ZE-XG)

"MEAN GREEN"
1956 Mainline (FG-BE)
|
|
|
|
|
Rono
|
|
|
Group: Forum Members
Last Active: Last Year
Posts: 1.3K,
Visits: 80.0K
|
I haven't had much luck with a "Search" function for a while. Rono
Ron Lane, Meridian, ID
|
|
|
|