|
Author
|
Message
|
|
Ted
|
|
|
Group: Administrators
Last Active: 2 days ago
Posts: 7.5K,
Visits: 205.8K
|
capelo (3/24/2020)
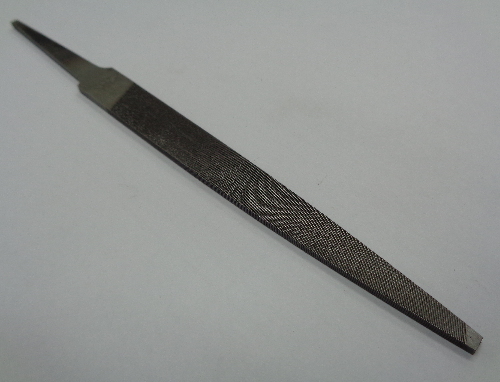
...About what you said about the beveling of the edges of the oil rings, what you mean, I don't quite understand what it means, an image would open my eyes. I have some doubts about the ring mottling, about which is the first and second rings (I put pictures). I also have the question of whether or not some type of lubrication should be used both in the rings and in the cylinders when its installation. Since there is an expression in the ring information that I don't understand "NEVER USE PLATED RINGS IN PLATED CYLINDERS (CONTAC RING ENGINEERING FOR CORRECT APPLICATION)Your particular set of rings are okay for your cylinders. Use a light weight engine oil on the cylinder wall and the rings as you are installing the pistons to their bores. Before you install the rings on the pistons, you will want to put them in the bores using an upside down piston to make the rings square with the bore. Check the ring end gaps with a feeler gauge. A rule of thumb is a minimum of 0.004” per inch of bore for the top rings and 0.003” per inch of bore for the second rings. On the oil rings, just make sure you have a minimum of 0.015” for the rails. Don’t’ be alarmed at a number much larger than this for the oil ring rails. Also do not make any modifications to the oil ring expanders. If you need to adjust the gaps on the 1st and 2nd rings, do so with either a file or a piece of equipment designed for this. If just doing the gapping with a file, then support the ring ends between two pieces of wood in a vice and use the file cutting only inward to increase the existing gap. Once you are comfortable with the ring end gaps in each cylinder, then take a fine file or honing stone and dress the ring gap edges so that no sharp burrs are present. Those burrs can scratch the cylinder walls if they are present. On the oil rings, do the same thing on the gaps on those with a file or a dressing stone but always make your cuts going inward so that no potential burrs are in a position to ride on your freshly honed cylinder walls. Here’s a picture of the ring end gap with the ring edges being ‘dressed’.
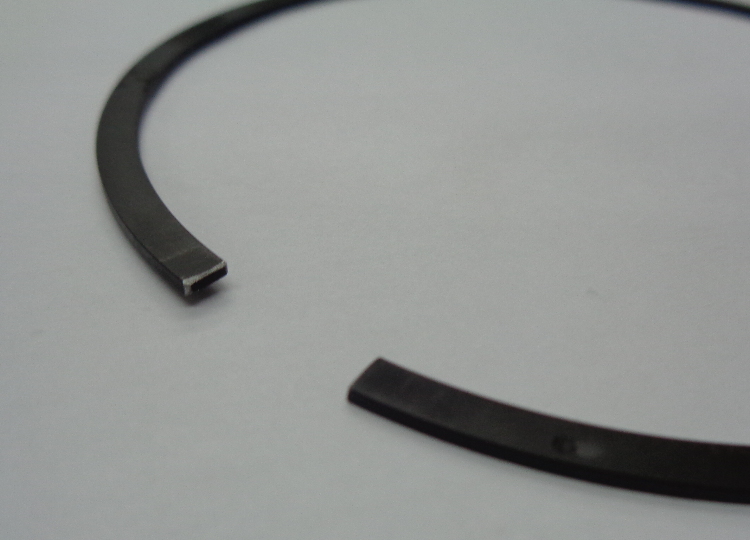
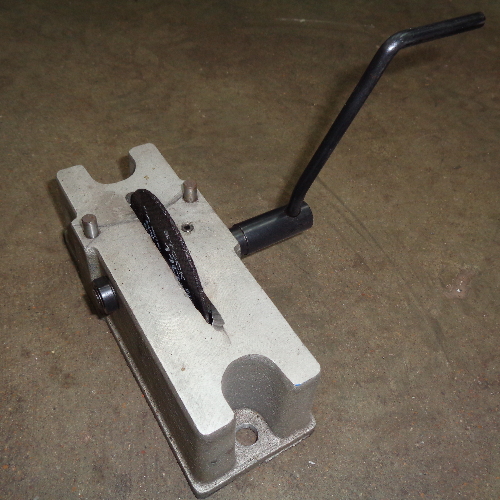
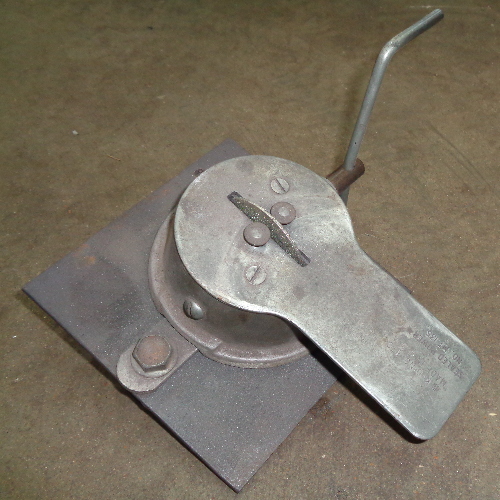
And here are some pictures of various ring gapping tools.
When installing the rings on the pistons, be sure to put them on the pistons orientated in regards to the tops and bottoms of the rings. If not marked accordingly, refer to the instruction sheet that comes with the ring package.
  Lorena, Texas (South of Waco) Lorena, Texas (South of Waco)
|
|
|
|
|
Ted
|
|
|
Group: Administrators
Last Active: 2 days ago
Posts: 7.5K,
Visits: 205.8K
|
capelo (3/24/2020)
Another question I have is about the position of the rods in the motor because the marks are not reliable and the previous assembly is not if it was adequate, the grooves where the bushings are fixed is the part that goes to the outside of the block ?For the Ford Y, the bearing tangs face the outside of the engine or away from the camshaft. If the rods are numbered correctly, those numbers will also face the outside of the engine or away from the camshaft. The double check for this is to look at the bearing in the rod. When the bearing is properly positioned on the journal, the bearing will be offset in the rod away from the journal’s side or edge. By design, the bearing is offset in the rod so that the bearing does not contact the journal radius at the edge of the journal.
Lorena, Texas (South of Waco)
|
|
|
|
|
Ted
|
|
|
Group: Administrators
Last Active: 2 days ago
Posts: 7.5K,
Visits: 205.8K
|
capelo (3/24/2020)
kevink1955 (3/24/2020)
I cannot help with the rings but if you are using the early edtion Eckman book do not use the photo of how to install the timing chain, it's wrong. I forget the number of pins between timing marks (12 I think) but the picture shows them on the wrong side of the engine. If your helper is not used to Y blocks he may want to line up the timing marks, dont to that either. Thats not how it works on a Y block
I think that was a good install guide on Ted's thread, use it and you will have no problemsthanks for the comment, I have that part well pointed, but since you comment, I will use Rollmaster red series and the camshaft that puts in the image below, the advance will be 2 ° as indicated by the paper, this is going for Ted While the camshaft has 2° of cam advance (4° at the crank) built into it, there’s no guarantee that is where the camshaft will install if just putting the crank gear at zero and going with 12 pins between the marks. Manufacturing variances in the various parts can have the camshaft installed far from desired which is why you must degree in the camshaft. When degreeing in the camshaft, target for 4-6° at the crankshaft. A bit more than 4° may be to your advantage as a new chain will stretch some initially thus retarding the camshaft some.
Lorena, Texas (South of Waco)
|
|
|
|
|
Ted
|
|
|
Group: Administrators
Last Active: 2 days ago
Posts: 7.5K,
Visits: 205.8K
|
capelo (3/24/2020)
...On the axial games and the clearances, I have read: crankshaft end play 0.001 "to 0.006".+ Camshaft end play 0.001 "to 0.006". Maximum clearance between rods 0.019 ". Is all this correct or should we add something new? As a general rule, it’s better to be on the loose side rather than the tight side when it comes to clearances. I’m good with up to 0.010"-0.012” for crankshaft end play. I prefer 0.004”-0.006” for the camshaft end play. No less than 0.010” for connecting rod side clearance while I target for 0.025” rod side clearance on the performance applications. Keep in mind that having additional rod side clearance has no effect on oil pressure.
Lorena, Texas (South of Waco)
|
|
|
|
|
capelo
|
|
|
Group: Forum Members
Last Active: 5 Years Ago
Posts: 279,
Visits: 4.5K
|
Thanks for the comments, I have checked all the rings and they are all within 0.015 ". I forgot a question, the camshaft is impregnated with a kind of grease, for assembly I have to clean it before?
|
|
|
|
|
Ted
|
|
|
Group: Administrators
Last Active: 2 days ago
Posts: 7.5K,
Visits: 205.8K
|
capelo (3/25/2020)
...I forgot a question, the camshaft is impregnated with a kind of grease, for assembly I have to clean it before? You will need to clean the camshaft before using it. The grease you see on the camshaft is a preservative or protective coating to keep the camshaft from rusting during storage. That coating is not a lubricant. As a result, the cam needs to be thoroughly cleaned when it comes out of the box and then the lobes coated with the moly lube supplied with the camshaft before installing it in the engine. Coat the bottoms of the lifters with that same moly lube but use only engine oil on the lifter shanks.
Lorena, Texas (South of Waco)
|
|
|
|
|
capelo
|
|
|
Group: Forum Members
Last Active: 5 Years Ago
Posts: 279,
Visits: 4.5K
|
Ted (3/24/2020)
capelo (3/24/2020)
kevink1955 (3/24/2020)
I cannot help with the rings but if you are using the early edtion Eckman book do not use the photo of how to install the timing chain, it's wrong. I forget the number of pins between timing marks (12 I think) but the picture shows them on the wrong side of the engine. If your helper is not used to Y blocks he may want to line up the timing marks, dont to that either. Thats not how it works on a Y block
I think that was a good install guide on Ted's thread, use it and you will have no problemsthanks for the comment, I have that part well pointed, but since you comment, I will use Rollmaster red series and the camshaft that puts in the image below, the advance will be 2 ° as indicated by the paper, this is going for Ted While the camshaft has 2° of cam advance (4° at the crank) built into it, there’s no guarantee that is where the camshaft will install if just putting the crank gear at zero and going with 12 pins between the marks. Manufacturing variances in the various parts can have the camshaft installed far from desired which is why you must degree in the camshaft. When degreeing in the camshaft, target for 4-6° at the crankshaft. A bit more than 4° may be to your advantage as a new chain will stretch some initially thus retarding the camshaft some. Thanks again, I will go to 6th then for my application. On cleaning and lubricating the camshaft and lifters. I suppose that the distribution system will happen the same, it is impregnated in grease for its conservation and I will have to wash it and then lubricate it.
|
|
|
|
|
capelo
|
|
|
Group: Forum Members
Last Active: 5 Years Ago
Posts: 279,
Visits: 4.5K
|
I have any questions with the boards when to use, I put images: 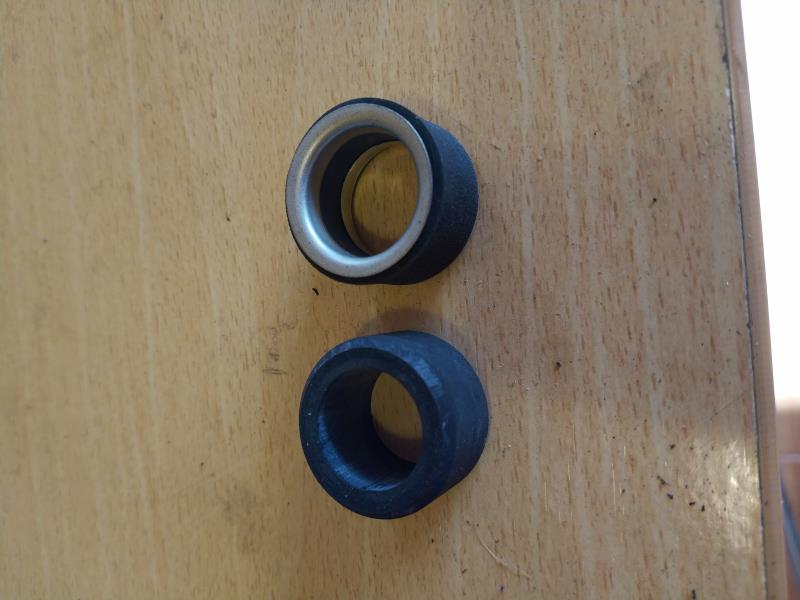 
|
|
|
|
|
capelo
|
|
|
Group: Forum Members
Last Active: 5 Years Ago
Posts: 279,
Visits: 4.5K
|
They could identify these Gasket: 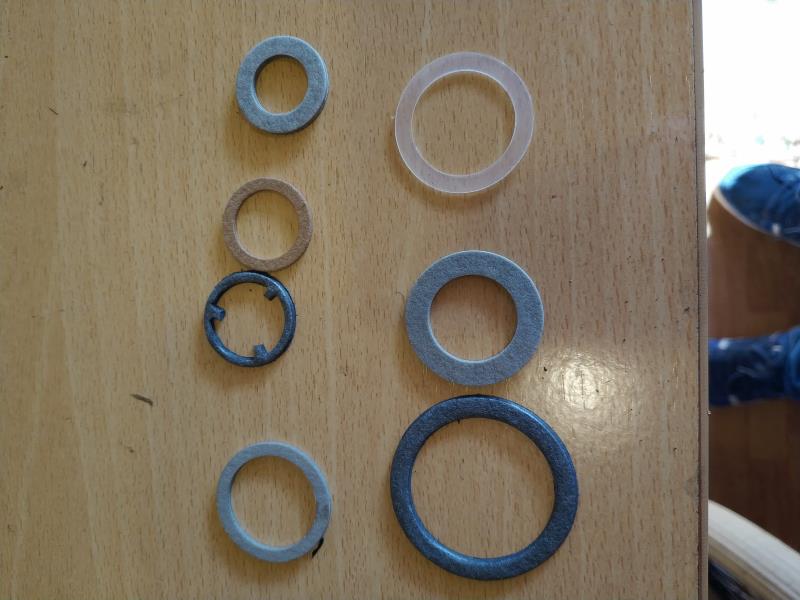 how clarification am I using this game: 
|
|
|
|
|
paul2748
|
|
|
Group: Forum Members
Last Active: Yesterday
Posts: 3.6K,
Visits: 497.7K
|
One of the blue ones s/b for the rear road draft tube for a TBird. I think it's the middle one on the right.
54 Victoria 312; 48 Ford Conv 302, 56 Bird 312
Forever Ford
Midland Park, NJ
|
|
|
|